The Social Scene
Capturing glitter & cat eye finishes effectively on camera
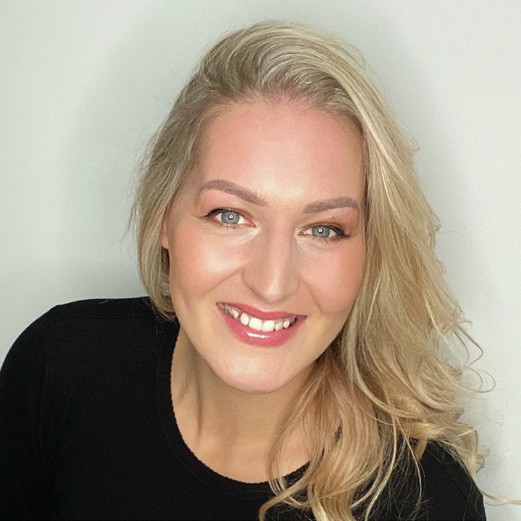
ZOYA MAC shares social media advice & pointers to raise your business profile & elevate your content
About Zoya Mac
Zoya is a nail content creator based in West Sussex. After spending over eight years as a nail artist, she transitioned into roles in social media management and content creation for nail brands. Zoya is passionate about creating captivating and engaging product and tutorial videos. She helps industry brands to showcase their products in clear, authentic ways, and teaches other nail artists how to confidently record their own videos.
@zoya_mac
TOP TIP
Use your client diary as a content plan
At the beginning of every week, spend five to 10 minutes looking through your diary and noting down any appointments that could be good opportunities for capturing content.
Maybe a client has particularly beautiful hands, another has booked intricate nail art, or you’re expecting an exciting nail transformation that would make a great before and after comparison.
Choose a couple of appointments and make a ‘don’t forget’ shot list. Think of it as a mini content plan that works around your diary. By the end of the week, you’ll have a bank of photos and clips ready to edit and post.
#NOWTRENDING
WHAT’S HOT
Knowing when to use Edits by Instagram Instagram’s Edits app is worth having on your radar. Built specifically for short-form videos, it offers everything from detailed editing and keyframes to planning tools and, importantly, useful insights into how your content performs once it’s posted.
You may have heard the rumour that creating a Reel in Edits gives you better reach. Although Instagram previously confirmed that content created using Edits was receiving a small, temporary boost while it was encouraging people to try the app, it was never a magic algorithm hack. In fact, Instagram specifically warned against passing finished videos through Edits in the hope of getting extra views.
Personally, I do most of my editing in CapCut because it’s the workflow I know and enjoy. I use Edits to support aspects of my Instagram content, such as adding final touches like music and captions, making small adjustments to videos and reviewing performance insights.
So, don’t feel like you need to abandon your favourite editing app. For me, the biggest benefit of Edits isn’t chasing reach; it’s understanding what’s happening once I press publish.
WHAT’S NOT
Letting AI take away your personality AI can be an amazing tool for creating content, and I’m definitely not against using it. However, one thing I am starting to tire of is people producing content using similar templates, prompts and tools. Although this can look flawless, it can come at the expense of personality. When lots of accounts use a similar style, it becomes harder to recognise who created a post.
I’d rather see content that’s a little simpler, but instantly feels like you. Using the same fonts, layouts, photography and writing style for your content isn’t boring; over time, those consistencies become part of your recognisable style.
None of this means you should stop using AI. Utilise it for ideas, planning, help with wording and even visuals if that works for you. But look at what happens afterwards. Do your AI posts start conversations? Are they saved or shared? Do they encourage an enquiry or achieve what you want them to?
It’s crucial to make the most of AI without losing the parts of your content that feel authentic to you.
While everyone loves to see a sparkly nail style, it can be hard to showcase glitter and cat eye products to their full potential on a phone camera. However, a few changes to your settings, lighting and angles can make a huge difference.
Lighting matters
If you’ve ever tried filming a glittery nail design under a basic household light and wondered where all the sparkle went, you’re not alone – there’s a reason for this dull look.
Glitter is made up of tiny particles that catch the light individually. Although very soft, diffused lighting can illuminate a nail beautifully, it can flatten sparkle. This is because it reduces the strong reflections that make glitter shimmer.
To show glitter in all its glory, use a professional studio light or take advantage of sunlight. Using the torch from another phone can work too. To do this, place the phone you’re recording with on a stand or holder directed at your nail design. Then, use the flashlight from the second phone to make the glitter glisten.
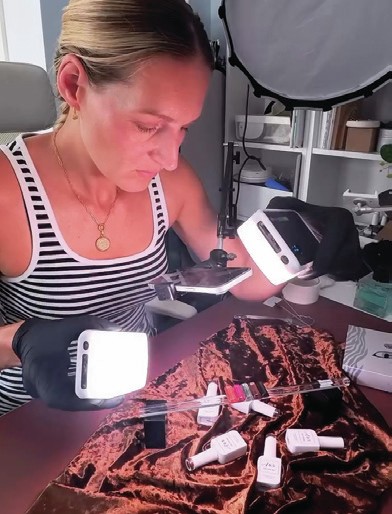
Behind-the-scenes: capturing Allure Beauty Supplies’ Crystal Cat Eye Gel Polish Collection.
Lower exposure = more depth
Reducing exposure can help showcase cat eye, chrome and other reflective finishes. Although it’s natural to assume that brighter lighting makes for a better video, too much light can remove some of the depth you’re trying to capture.
On an iPhone, open the camera app and position the manicured hand in the frame. Tap on the subject on the screen, then drag the yellow sun icon that appears downwards to gently lower the exposure. You may suddenly notice a cat eye effect becoming more defined, chrome looking richer or details appearing that were previously getting lost.
There’s no magic exposure setting for every product; your eyes are one of the best tools for finding the sweet spot.
Move the nail, not the camera
The full potential of a cat eye effect often isn’t seen until the nail is moved under light. To show this, I find it much easier to keep my phone steady and slowly tilt the nail. As the angle changes, the magnetic effect becomes clearer and more depth appears.
The same applies to glitter and chrome. Spend a few seconds finding the best angle before pressing record, rather than trying to figure this out midway through filming.
Glossy nails are basically tiny mirrors, so they can sometimes pick up distracting light reflections on their surfaces. Moving nails slightly can be enough to remove these, while still showing beautiful highlights.
Share both views
I love a close-up, particularly when I’m filming glitter or cat eye nails. But to maintain the magic of a macro shot, you must use it sparingly. Give your audience an overview of the nail finish first, then move closer to capture the glitter or magnetic particles in detail.
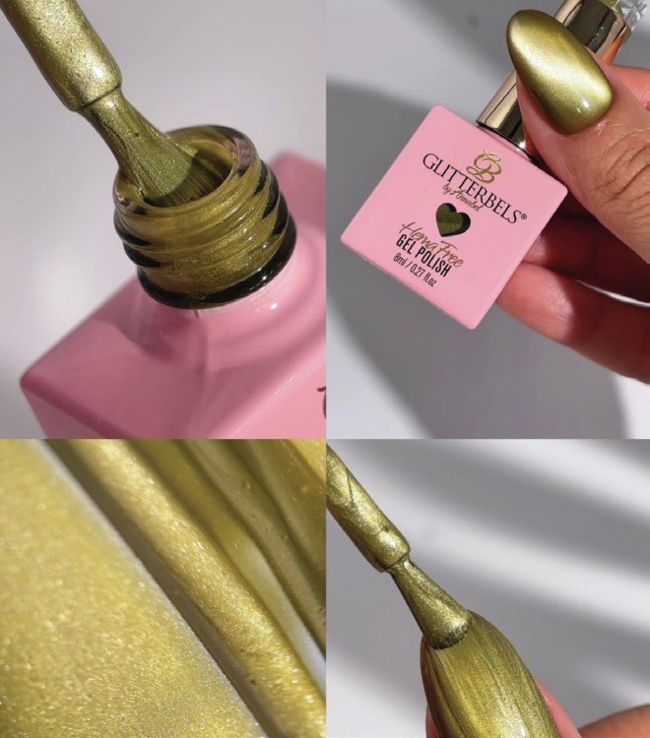
Creating content for Glitterbels, featuring the Cowgirl Club Hema Free Gel Polish collection.
Keep editing true to life
I mainly use CapCut and Edits by Instagram for my videos, but when I’m showcasing a product, I take care not to adjust colours too much. Lighting, camera quality and even the screen someone is watching on can change how a nail colour appears. Colour correction or the addition of heavy filters can make a product look different from its true shade.
When editing, keep track of reality by asking yourself the following questions:
• Does the skin tone look natural?
• Is the colour of the product accurate?
• Can I see the sparkle and depth shown in the video with my own eyes?
When showcasing nail products on social media, the goal isn’t simply to make them look beautiful; it’s to help someone understand exactly what the products can achieve, or what their nails could look like after an appointment with you.
Until next time, keep creating – and remember to wipe your camera lens!
Creator spotlight
This month, I want to highlight the talented Bara Hoyle – a luxury manicurist, educator & digital creator. If you love clean, minimal and beautifully considered nail content, her page is one to follow.
There’s something so calming about Bara’s work. Her content is simple, expertly styled and never feels overcrowded, and it always showcases gorgeous shades, delicate details and a real eye for composition. It also serves as a reminder that content doesn’t need lots of props or complicated setups to make an impact. Sometimes, letting nails speak for themselves is more than enough. Follow Bara on Instagram: @bara.hoyle
“When showcasing nail products on social media, the goal isn’t simply to make them look beautiful; it’s to help someone understand exactly what the products can achieve, or what their nails could look like after an appointment with you.”
Behind-the-scenes
September was filled with creating autumn and Christmas-themed content. I started filming festive videos back in August, and since then I’ve been surrounded by beautiful new nail shades and gorgeous glitters. I’m excited to share them as we move closer to the festive period.