6 steps to craft a realistic human eye
The eye is one of the most important elements of the human face. I begin my face sculpting workshops with the creation of the eye as a fundamental. It is the mirror of the soul, and the emotion conveyed by its gaze can communicate the character and feeling of a subject.
About Elena Maltseva
Elena boasts over 25 years’ nail industry experience and works as an international educator, coach and competition judge. She is a three-time nail art world champion and runs online courses, specialising in hand-painting, mixed media art and 3D acrylic sculpting. www.nailartacademy.online /elena.maltseva.7792 @elena_maltseva_nail
When honing this skill, start with reference images: ideally pencil sketches like this.
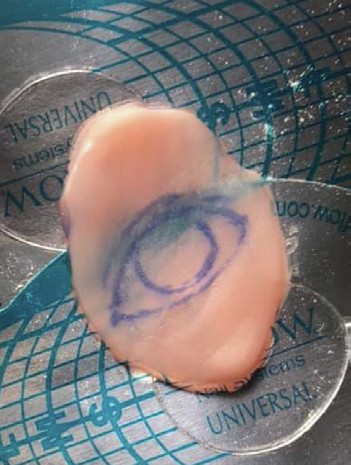
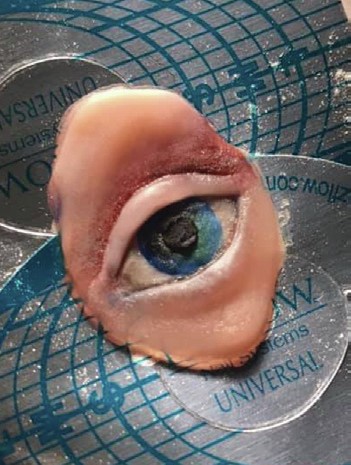
Step 1 Use L&P acrylic in nude tones to create the section of the face where the eye will sit. After this base has set, outline the location, size and shape of the eye.
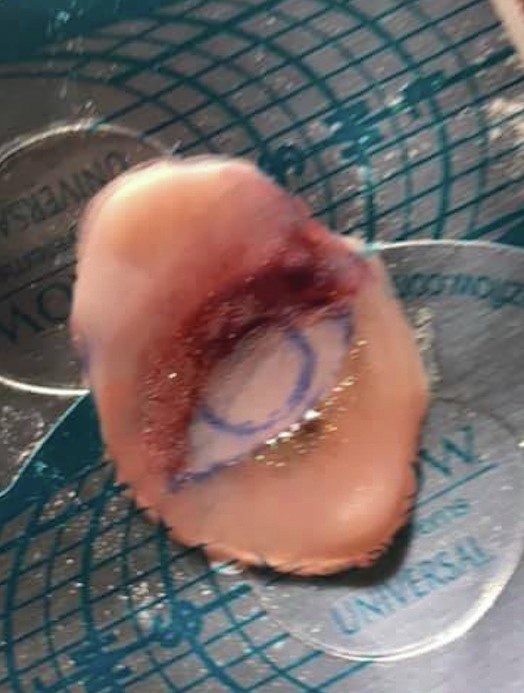
Step 2 Use L&P acrylic shades that convey a shadow effect, such as brown, grey and lilac, to define the upper eyelid. Use lighter hues, including some with shimmer, to accentuate the lower eyelid.
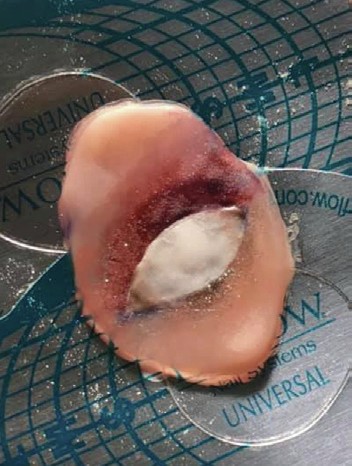
Step 3 Add the white of the eye using acrylic paint, applying a thin layer over the entire eyeball shape.
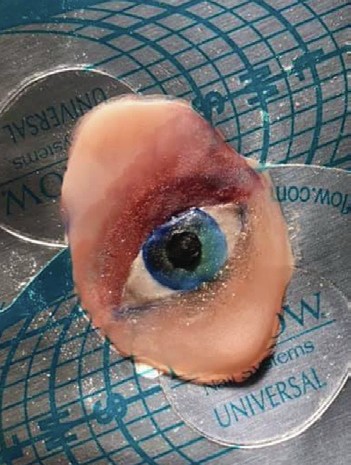
Step 4 Create the iris using acrylic paints. This is where you can experiment with colour, but it’s best to use three shades that are near each other on the colour wheel. For example: blue, light blue and turquoise; brown, terracotta and orange, or olive, brown and turquoise. Add shadows to the inner and outer corners of the eye.
Step 5 Define the upper and lower eyelids using nude L&P acrylic shades. Use clear or pink L&P acrylic to create volume, but not too much thickness, and white L&P acrylic to add subtle highlights to the edges of the eyelids. Apply a semi-transparent grey shade under the upper eyelid.
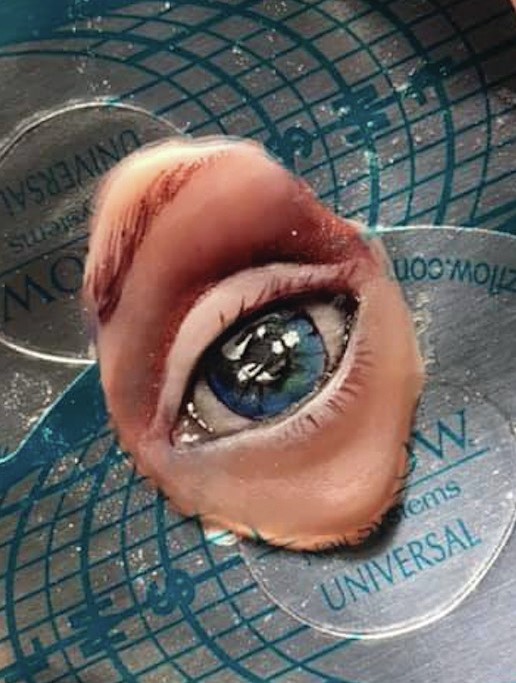
Step 6 Use gel paints to accentuate the eyelids, create realistic effects within the iris and convey iridescent highlights. Add white gel paint for the final highlights. Cure between each colour application.
Create an eyebrow using gel paints. Avoid making this too dark – instead, build up light shades, curing after each layer. Start with soft brushstrokes and add stronger ones as you develop the brow.
Perfecting the eyelash effect
Lashes are the key to a natural-looking eye. You’ll notice that the eyelashes I painted appear elevated. The secret to this is a thin application of clear L&P acrylic, then matte gel polish no-wipe top coat between the eye art and lashes. Create eyelashes using a range of gel paint shades, not just black. The first layer of lashes should be light, and only after that should you add a little bit of black. Don’t add too many lashes, and ensure they are not overly close, parallel, long or thick. Remember the golden rule: less is more!