TECH-NIQUE
Boss the BLEND
Polish up your ombré application with tech tips, design inspiration & step-by-steps

Laura Peat
At the time of writing, #ombrenails boasts almost eight million Instagram posts and over 215K TikTok videos, owing to the timelessness and versatility of the style. “I believe that ombré nails are so popular because they allow for thousands of colour combinations, from the traditional two-toned ombré to five or six blended colours. The gradient can be horizontal, vertical or diagonal, all of which create an amazing finish,” says Laura Peat, Lecenté educator.

Kamila Borowiec
“Classic ombré nails in a pink & white or ‘baby boomer’ style are particularly requested by clients who require a sophisticated, neutral look due to the nature of their job, or those who seek a design for a special occasion,” reveals Kamila Borowiec, Kirsty Meakin brand ambassador & Scratch Stars Polish & Paint Artist of the Year 2023.
But how can a flawless ombré finish be achieved? Nail pros share their tips and techniques...
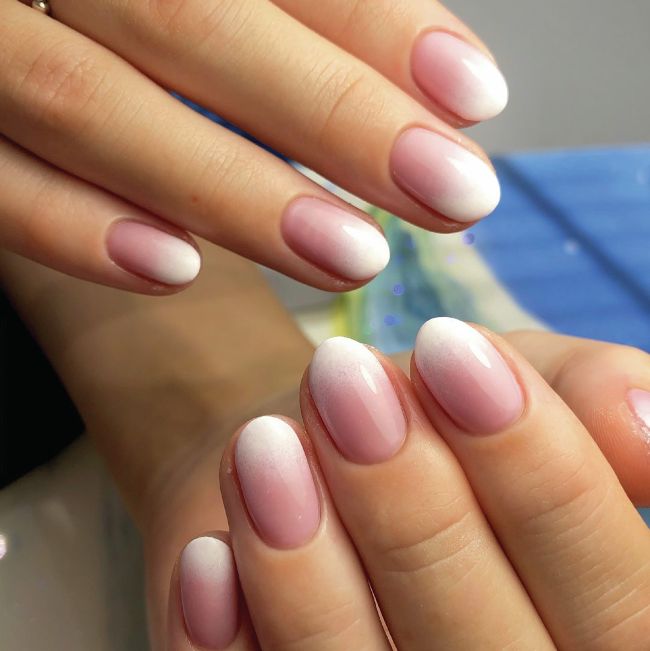
Salon System nail expert, Julie-Anne Larivière, showcases the timeless elegance of the baby boomer style using Gellux gel polishes.
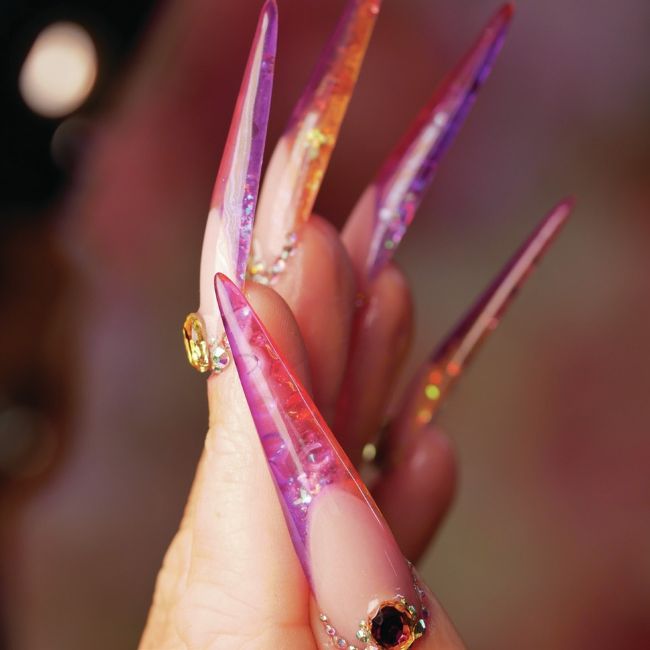
Using her range of Jelly Gloss Top Coats, Kirsty Meakin brings chic ombré styling to an elongated French manicure.

Sophie Donaldson
Ombré techniques
Sophie Donaldson of Sophie’s Cosy Corner, Kent & the nail stylist behind this month’s cover look, shares four ways to achieve an ombré nail...
1. Use a sponge and gel polish or art gel. Some techs sprinkle acrylic powder between the layers to produce a seamless blend.
2. Use an ombré brush with a small amount of gel polish or art gel. Again, acrylic powder can be added between the layers.

The Manicure Company Ombre Nail Art Brush
£10.97 inc VAT www.themanicurecompany.com
3. Use glitter gel polishes or glass gel to easily achieve a blend.
4. Use powders, pigments or chrome powders.
TOP TIP
“Don’t overload your ombré brush with product – let the brush do the work. Take your time and create multiple layers, rather than using lots of product. If you aren’t happy with your ombré finish, glitter or a glitter top coat can enhance it.”
STEP-BY-STEP: Three-toned talon
Laura Peat shares how she blended three gel polish hues on a nail using Lecenté products...
Step 1 Prep the nail and paint it in sections using your chosen shades. For an ombré look, it’s important to use highly pigmented gel polishes, such as the Lecenté Create range, to achieve good coverage without repeating the blend many times.
Step 2 While the gel polish is uncured, use a make-up sponge to dab the nail from left to right and ever so slightly up and down as you work across. Repeat this motion until you achieve a blend between sections.
Step 3 Sprinkle the nail with clear acrylic powder and cure.
Step 4 Dust off any excess powder with a duster brush. Paint more gel polish onto the sponge. Again, move the sponge from left to right and slightly up and down over the nail until a blend is created. Cure.
Step 5
Remove any air bubbles. I applied Lecenté
Original Gel Polish Base Coat, as this has a thick consistency that smooths out bumps and unevenness. Cure.
Step 6 The Original Base Coat leaves a tacky inhibition layer, which is perfect to add detail to. I scrunched up Lecenté Pure Gold Nail Foil and dabbed it onto the nail, finishing the look by applying Lecenté Create Matte Top Coat and curing.
Instagram: @simplykokoderby
Lecenté products are available via www.lecente.com / www.sweetsquared.com / www.ellisons.co.uk
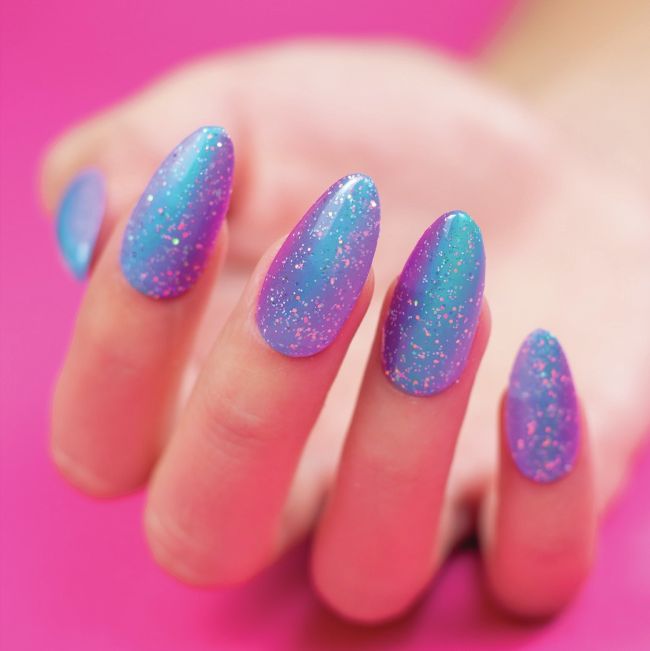
Light Elegance educator, Ashley Biasella of @badash_nails, creates glittering gradients using the Viva La Fiesta collection.

Kay Kirsop
Vertical ombré
“A vertical ombré style looks really effective, but can be challenging to achieve,” comments Kay Kirsop, Louella Belle brand ambassador. “I paint half of the nail in one colour and half in another, slightly overlapping the two then blending with the Artistic Nail Design ‘Striper’ Striping Brush until I’m happy with the appearance. Don’t worry about having slightly more gel polish on your brush when creating the blend – it can be brushed to the free edge, where excess can be easily removed.”
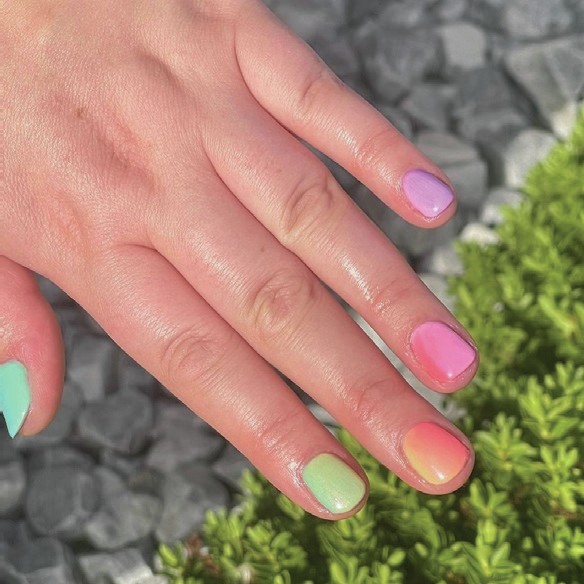
Nails by Kay Kirsop.

Artistic ‘Striper’ Striping Brush
£12.95 + VAT www.louellabelle.co.uk
STEP-BY-STEP: Mixing with marble
Kamila Borowiec shows how she blended L&P acrylic atop a marble gel polish base to create an eye-catching ombré, using Kirsty Meakin products...
Step 1 Prep the nail. Using an ombré brush, pick up a small amount of your chosen gel polish colours and drag them down the nail, creating a marble effect. Towards the top half of the nail, use the brush to pull the gel polish upwards so that no harsh lines are left. Cure. Apply top coat solely to the marble section of the nail and cure.
Step 2 Using an acrylic brush, place the first bead of pink L&P acrylic where the gel polish ends and blend it downwards.
Step 3 Place the second bead a little higher and repeat the process of step two. Depending on the length of the nail, you may only require two beads.
Step 4 Apply the third bead of acrylic close to the cuticle and blend it downwards.
Step 5 To avoid ruining the nail look while filing, place a bead of clear acrylic where the blend of the pink and marble begins. Drag the bead down then upwards.
Step 6 Place another bead of clear acrylic by the free edge and blend it upwards.
Step 7 Shape the nail by filling the free edge, then file the entire nail to eliminate unnecessary bulk. Buff the nail surface.
Step 8 Apply top coat to finish and cure.
Instagram: @glamliciousnails
Kirsty Meakin products are available via www.kirstymeakin.com
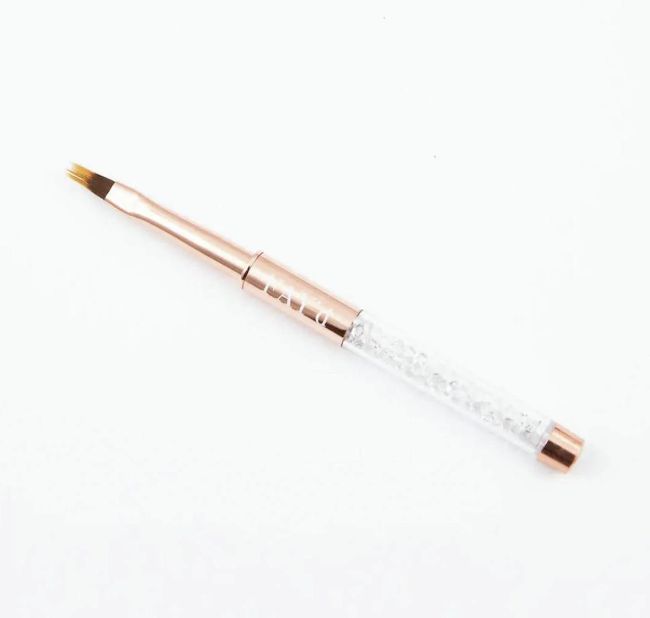
Kirsty Meakin Fay’d Ombré Brush
£12.99 + VAT www.kirstymeakin.com TOP TIP
The acrylic powder you use should have a consistency that is easy to blend and won’t marble, otherwise this could ruin the ombré style.
TOP TIP
“When creating an ombré design using powders, I apply top coat to the client’s nail first, so that if they don’t like the ombré appearance, the colour underneath won’t be affected.”
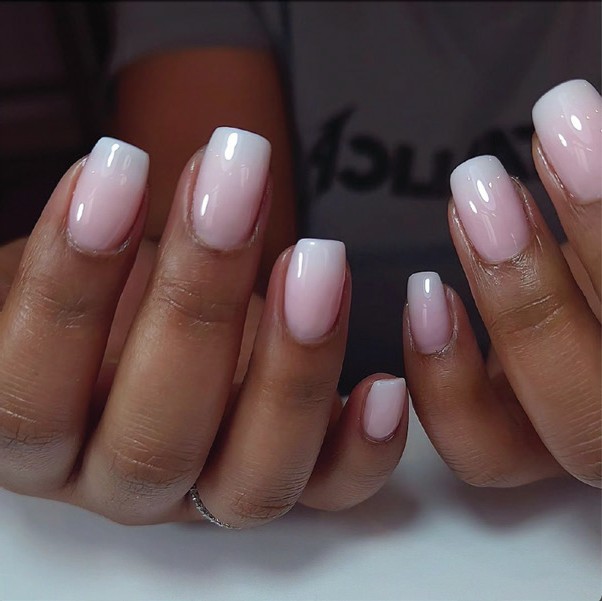
South Africa-based Micaela of @coatednail seamlessly blends pink into a milky white gel hue.
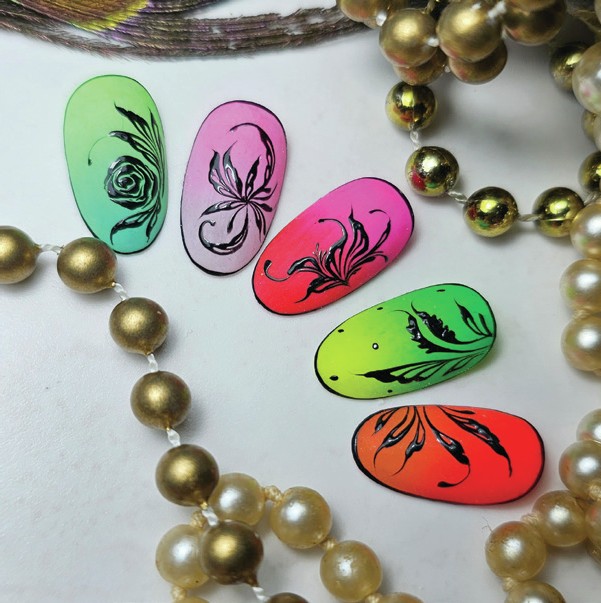
Neon colour blends make for standout bases for black floral art, as shown by Sophie Donaldson.
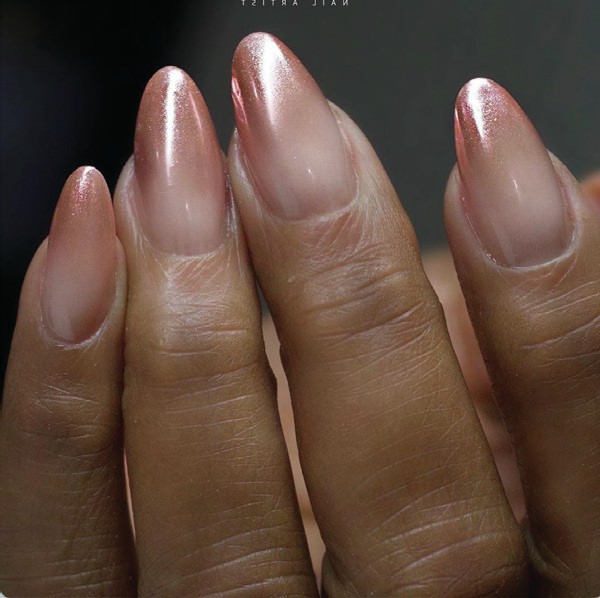
Ilia Enid of @nails_makeupbyiliae, Florida, wows with a rose gold chrome ombré.

Ruth Munro
STEP-BY-STEP: Powder perfection
Magpie Beauty nail educator, Ruth Munro, reveals four steps to create a powder ombré look...
Step 1 Prep the nail, then apply a matte top coat and allow it to self-level. If there are any imperfections on the nail, like brush strokes, the pigment powder will cling to them, so turn the nail upside down to ensure a smooth finish. Cure.
Step 2 Load a fluffy brush with pigment powder. Press the pigment firmly onto the bottom third of the nail.
Step 3 Remove excess powder from the brush by wiping it on dry couch roll. Gently move the brush from side to side across the second third of the nail.
Step 4 File the free edge and use a soft duster brush to dust downwards. Encapsulate the look using a base coat and cure. As pigment is too smooth for gel to adhere to, this prevents chipping if you want to add nail art to the look, once the inhibition layer has been removed. Alternatively, apply top coat to finish and cure.
Instagram: @littleblankspaces
Magpie Beauty products are available via www.magpiebeauty.co.uk